Tim Holtz Sizzix Halloween- Pumpkin Patch Colorize

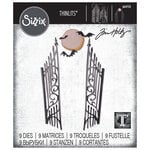
Hello, crafty friends! Now that fall is officially here, it’s time to share all things spooky! And today I have a spooky sweet fabric project to share that I made for the Tim Holtz Sizzix Halloween release… a small pillow tuck made with Tim Holtz Eclectic Elements fabric and felt and the new Pumpkin Patch Colorize die set.

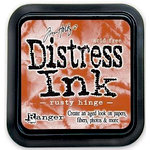
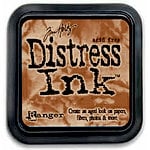
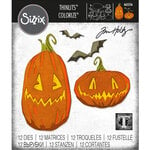
Now Tim has released lots of pumpkin die sets over the years, but this new Colorize set is a true favorite. In this set, you receive two different jack o’lantern images and two different bats, each with multiple layers that you die cut and stack for a real 3D appeal. I love that the dies come with base shapes, and then pieces that you layer to build up the design. You can see that I used yellow felt for the base here, and then stacked three shades of orange felt and two shades of green felt for the stems. And a little tip, if you don’t have enough colors of felt (or even paper, for that matter), you can add Distress ink to the felt to change the shade. For this project, I only had two colors of orange felt, so I inked up the felt with Rusty Hinge Distress ink to make a third, darker shade.

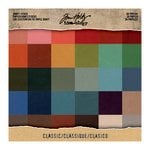
The felt I used is from Benzie Designs, and it really does die cut beautifully. Therm O Web Sprayn’Bond Fusible Adhesive was really helpful for adhering all these pieces together, without the need to sew. I fused the pumpkin and bats to a backing of Abandoned Eclectic Elements fabric and used a row of pom pom trim to create a grassy border. A bit of Distress-dyed seam binding was added in a bow, and vintage rick-rack trim was sewn around the border.

I love this time of year! Happy Fall y’all!


The supplies I’ve used are linked and/or listed below:

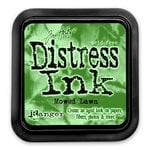
Sizzix - Tim Holtz - Thinlits Dies - Pumpkin Patch Colorize Ranger Ink - Tim Holtz - Distress Ink Pads - Rusty Hinge Ranger Ink - Tim Holtz - Distress Ink Pads - Mowed Lawn
Benzie Felt
Eclectic Elements Abandoned Fabric Collection
Trim

Tim Holtz Sizzix Halloween- Costume Party

Happy Saturday, crafty friends, and thanks so much for stopping by! It’s now September, and those of you have been following me for awhile probably already know what that means…. this is the time of year when my brain turns to all things fall and my favorite holiday of all, Halloween. Today I wanted to share one of the projects that I made for the Tim Holtz LIVE Sizzix Halloween reveal. This spooky sweet 5×7 desk frame features new dies and new limited edition grit paste and glitter from Tim’s Halloween release.

Can you even resist these cute little characters? This trio is from the Costume Party Thinlits die set, and it is the latest in the Colorize line. If you’re not familiar with Colorize, it’s basically layers of dies that you build up following the color code stamped on the back of each die. I used a combination of Kraft Stock cardstock and Distress-inked watercolor cardstock to build my trick-or-treaters, and I love how the mix of surfaces adds contrasting visual texture to the finished design. And for even more fun, I used the special limited edition Nightfall Glitter from the Distress Sparkle Set for some sparkly accents on eyebrows, eyes, and hair.

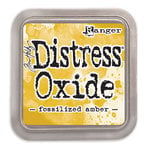
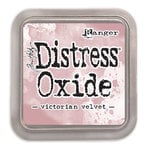
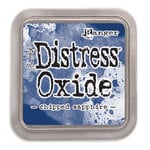
The background of the frame is Distress watercolor cardstock that has been inked with Victorian Velvet, Stormy Sky, and Chipped Sapphire Distress Oxide. I masked the moon from an older set, Gate Keeper, and inked around the mask with Fossilized Amber Oxide to add the warm glow of the moon. I watercolored more oxide over the scene using a thin paintbrush, and that created the windy swirls that you see. Then splatters of Picket Fence paint create the look of stars.

The little die cut bats are also from the Gate Keeper die set, and I added in stamped tombstones from the old Village Graveyard set. I believe the graveyard set has been discontinued, but there are tombstones in the new Halloween Vault set that could be substituted. I cut the ground freehand from kraft stock cardstock, and swiped it with a bit of Distress paint to add color contrast and depth. The frame itself was painted with a combination of Picket Fence and Black Soot Distress paint, which was then sanded to remove some of the paint before adding the fabulous Crypt Distress Grit Paste from the limited edition Halloween Texture Set. The Grit Paste was sanded, too, and the whole finished result gives that fabulous aged, time worn appearance I truly love at Halloween.

Have you started on Halloween crafting? Have a favorite from the Tim Holtz release? I’d love to hear!


The supplies I’ve used are linked and/or listed below:

Idea-ology - Tim Holtz - 8 x 8 Kraft Stock - Classic Ranger Ink - Tim Holtz - Distress Watercolor Cardstock - 8.5 x 11 - 10 Pack Sizzix - Tim Holtz - Thinlits Dies - Costume Party Colorize Sizzix - Tim Holtz - Halloween - Thinlits Die - Gate Keeper Sizzix - Tim Holtz - Thinlits Dies - Vault Series - Halloween 2021 Tim Holtz Distress Ink Pads - Antique Linen Tim Holtz Distress Ink Pads - Tea Dye Tim Holtz Distress Ink Pads - Frayed Burlap Tim Holtz Distress Ink Pads - Black Soot Ranger Ink - Tim Holtz - Distress Ink Pads - Candied Apple Ranger Ink - Tim Holtz - Distress Oxides Ink Pads - Fossilized Amber Ranger Ink - Tim Holtz - Distress Oxides Ink Pads - Victorian Velvet Ranger Ink - Tim Holtz - Distress Oxides Ink Pads - Stormy Sky Ranger Ink - Tim Holtz - Distress Oxides Ink Pads - Chipped Sapphire Ranger Ink - Tim Holtz - Distress Oxides Ink Pads - Shabby Shutters Tim Holtz Flip Top Distress Paint PICKET FENCE Ranger TDF53170 Tim Holtz Flip Top Distress Paint BLACK SOOT Ranger TDF52937 Ranger Ink - Tim Holtz - Halloween - Distress Texture Paste Set
Tim Holtz Sizzix Village Graveyard Thinlits Die Set
Distress Sparkle Set: Nightfall Glitter
Hero Arts Printer’s Type Lower Stamp Set

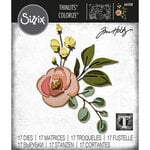
Tim Holtz & Sizzix 2021 Chapter 1- Bloom Colorize


Hello, Crafty Friends, and happy Tuesday to you all! Today I am excited to share another one of my makes for the Tim Holtz Sizzix 2021 Chapter 1 Release, shared recently on YouTube Live. This is the beautiful new Bloom Colorize die set along with the new Alphanumeric Bold set, on a 5×7 desk frame.


I am a huge fan of Tim’s Colorize die sets, and was super happy to see florals now included in the line. This set includes a gorgeous stylized flower that reminds me of a rose or a camelia, as well as a branch of buds, berries, and greenery, too. One of my favorite things about this set is that the pieces look great in just about any color, so you’re not roped into a limited color palette or design.


I die cut my botanical pieces mostly from Kraft Stock cardstock, but did mix in layers that were inked with Distress Oxide. I really like the visual textures you get from mixing different mediums, and that’s a great way to add a bit of dimension to an otherwise relatively flat design.


I almost always remove the glass when I alter a frame, and that’s what I did this time, as well as removing the top of the frame in this case, too.  For this project, I stamped and inked a watercolor cardstock background and layered it onto a green cardstock base. The base was then adhered to the back of a cheap thrift-store 5×7 desk frame, and topped with an Idea-ology frame that was painted and inked. I love creating my own frames and decor from my favorite Idea-ology pieces for a truly unique project design.


Here’s my finished frame with my Mr. Rabbit pillow. Definitely makes me ready for spring. How about you?


The supplies that I’ve used are linked and/or listed below:

Ranger Ink - Tim Holtz - Distress Watercolor Cardstock - 8.5 x 11 - 10 PackIdea-ology - Tim Holtz - 8 x 8 Kraft Stock - ClassicAdvantus - Tim Holtz - Idea-ology Collection - 12 x 12 Paper Stash - DapperSizzix - Tim Holtz - Thinlits Dies - Bloom ColorizeSizzix - Tim Holtz - Thinlits Dies - Alphanumeric BoldTim Holtz Cling Rubber Stamps FLURRY AND PINE CMS312Tim Holtz Idea-ology FRAMED PANEL Structures TH93283

Ranger Ink - Tim Holtz - Distress Oxides Spray - Fired BrickRanger Ink - Tim Holtz - Distress Ink Pads - Shaded LilacTim Holtz Distress Ink Pads - Brushed CorduroyRanger Ink - Tim Holtz - Distress Oxides Ink Pads - Old PaperTim Holtz Flip Top Distress Paint PICKET FENCE Ranger TDF53170

Stampin’Up Ribbon


The September Dining Room


Hello, friends, and happy Saturday to you! I’m back today to share the new dining room makeover that I mentioned in my last post. With September well underway, and all the kids back in school, it felt like it was time for a touch of fall.


With all the extra time we are spending in our homes these days, it seems that I am re-arranging the decor much more than usual. I’m finding it adds a touch of brightness in this otherwise rather gloomy period of time, and it’s giving me the perfect excuse to utilize pieces that don’t get out much.


For September, I decided to put together a fall theme with my favorite transferware dishes in brown and multi-color polychrome. These patterns, filled with flowers and fruits, make me think of  harvest and thanksgiving and all the beauty that fall brings.


I added in a few fall leaf picks and rustic baskets stacked with linens and dishes.


I think my idea to change out the sideboard is what finally spurred me to finish these fall prim pumpkins that have been on my worktable for the longest time. And I love how they look piled up in a basket.


I’ve added these prim fabric pumpkins to my AudOnes Shop. If you are interested, you can find them HERE


Brown-Eyed Sue is still here, taking center stage on my table.


I hope you enjoyed the new fall look. And if you haven’t had the chance yet, check out my shop for some newly listed items, including a few surprises from my own collection….


Have a great weekend, everybody! And thanks so much for stopping by!

2020 Summer Home Tour- Part IV The Entryway


Happy Friday, friends, and welcome to the last stop on my 2020 Summer Home Tour. August is quickly winding to a close, and with that, the end of summer is near. Shortly, I’ll be switching out the beachy and Americana decor for autumn and Halloween. But not before sharing with you this last summer spot…… my front entryway done up in an ocean nautical theme.


My front entryway table has a definite red, white, and blue vibe, and in my head, I’ve been thinking of it as an east coast meets west coast design. The table top is all east coast, with red geraniums that are the epitome of summer here in the southeast and a beach house reminiscent of some of my favorite local coastal homes.


The house is one of those light-up cottages from Dept. 56, and I really love having that little bit of nightlight in the evening hours. I stacked the house on some vintage books, which always make me happy. I have loved books my whole life, and always try to work them into my decor.


The tall Longaberger basket is filled with a few vintage dishes and antique wooden spools, and I filled in the nooks with shells and branches that I gathered on a trip to Key West several years ago.


More Key West shells, antique glass insulators, wood-carved sailors, and a wee wooden boat finish the east coast design.


Anyone who’s ever made a trip to San Francisco will recognize the west coast feel of the bottom half of my entryway table, with the buoys, shells, and crab so indicative of Fisherman’s Wharf…..my old stomping grounds.


I love stuffing this basket that I keep on the bottom shelf slap full, and my summer scene is no different. Besides the wooden buoys and crab, I’ve added another pair of wooden sailors, vintage linens and enamelware lids, a wooden starfish, and lots of shells, sand dollars, and bits of coral collected over the years.


Down from the entryway table is my vintage credenza, and there I’ve added just a few more nautical things. This wooden tray is actually a vintage cabbage slicer, and it’s got a massive cutting blade in the middle to prove it. I layered the slicer with more shells and star fish, a pair of tall wooden boxes, another wooden sailor, and a super cool whale figurine by Jim Shore.


At the other end of the credenza is a small scene with another wooden sailor, a fish carved from stone, and a beach picture I made with my friends during one of our crafty play days. It was my first attempt at wood-burning….. and so far, my last.


The final spot in my entryway is this black wooden bench nestled against the stairs. This area is filled with enamelware buckets and metal shopping baskets. Perfect containers to cram full of stuff.


This side holds a jumbo wooden fish and one of my vintage hammered aluminum pieces. The divided box is a papercraft project that I made many years ago. And the painted fish rock and ceramic octopus are some of my daughter’s hand crafts. Absolute treasures to me.


The other side holds more fish, both wooden and ceramic, large and small, and more hammered aluminum. The mermaid dollies are my own silly creations, and to date are probably some of my absolute favorites. I don’t keep a lot of the things I make…. but these I love.


I don’t let any decorating space go to waste, so even the underside of the bench gets some beachy things.


That wraps up my summer home tour for 2020! I hope you enjoyed! I’ll be back with more decorating soon, as I’ve got a new late-summer/early-fall dining room display to share before all the spooks of Halloween begin.

Thanks so much for stopping by!

Save

Save
Beside the Sea with Ranger Ink


Happy Friday, crafty friends, and welcome back to the blog! Summer is in full swing here today with this beach-inspired home decor project that I made this week for the Ranger Ink Project Page. This mixed-media piece is filled with sand and sea images and real seashells I’ve collected over the years, in a tropical summertime color palette of Distress Oxides, Inks, and new Embossing Glazes that I adore.


It seems like every time I go to the beach, I end up bringing home at least one container of shells. And most of the time, those shells sit in those little baggies or bottles for years, ignored. So happy I finally broke some of them out to add to this home decor plaque. I might not be making any actual trips to the beach anytime soon, but this brings back many happy memories and is a great way to incorporate some souvenirs into your decorating for the season.


I love the look of text print on just about anything. Adds some interest to an otherwise plain surface, like the background of this plaque frame. I simply added a layer of patterned paper to the wood plaque, and then proceeded to create an ocean view with lots of ink blending and masking, water droplets and the dimensional texture of Distress Crackle paste.


Then layers of coral branches and shells…. both real and paper versions. A bit of cheesecloth for extra texture, all finished off with a Tiny Type sentiment. Oh, how I long to be beside the sea! But perhaps for now, beachy decorations are the next best thing.

If you’d like to learn more about this project, I’ve got the complete step-by-step tutorial up on the Ranger Ink Project Page. Thanks so much for stopping by! Wishing you all a fabulous weekend!


The supplies I’ve used are linked below:

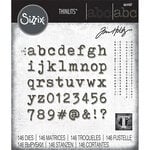
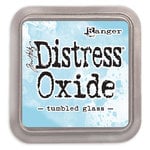
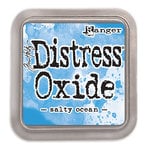
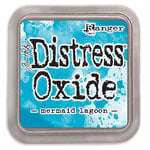
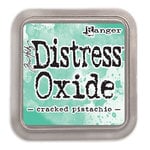
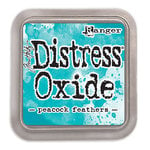
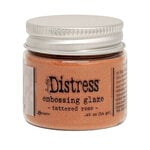
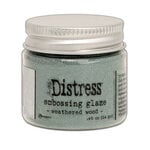
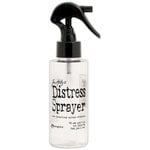
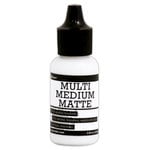
Ranger Ink - Tim Holtz - Distress Watercolor Cardstock - 4.25 x 5.5 - 20 PackIdea-ology - Tim Holtz - 8 x 8 Paper Stash - EtceteraSizzix - Tim Holtz - Alterations Collection - Bigz Die with Texture Fades - SeashellsSizzix - Tim Holtz - Alterations Collection - Thinlits Die - Holiday GreensSizzix - Tim Holtz - Thinlits Die - Alphanumeric Tiny Type UpperSizzix - Tim Holtz - Thinlits Die - Alphanumeric Tiny Type LowerRanger Ink - Tim Holtz - Distress Oxides Ink Pads - Tumbled GlassRanger Ink - Tim Holtz - Distress Oxides Ink Pads - Salty OceanRanger Ink - Tim Holtz - Distress Oxides Ink Pads - Mermaid LagoonRanger Ink - Tim Holtz - Distress Oxides Ink Pads - Cracked PistachioRanger Ink - Tim Holtz - Distress Oxides Ink Pads - Shabby ShuttersRanger Ink - Tim Holtz - Distress Oxides Ink Pads - Peacock FeathersRanger Ink - Tim Holtz - Distress Oxides Ink Pads - Abandoned CoralRanger Ink - Tim Holtz - Distress Oxides Ink Pads - Antique LinenRanger Ink - Tim Holtz - Distress Oxides Ink Pads - Brushed CorduroyRanger Ink - Tim Holtz - Distress Oxides Ink Pads - Gathered TwigsTim Holtz Distress Ink Pads - Brushed CorduroyTim Holtz Distress Ink Pads - Walnut StainRanger Ink - Tim Holtz - Distress Ink Pad - Hickory SmokeTim Holtz Distress Ink Pads - Black SootRanger Ink - Tim Holtz - Distress Embossing Glaze - Tattered RoseRanger Ink - Tim Holtz - Distress Embossing Glaze - Weathered WoodRanger Ink - Tim Holtz - Distress Texture Paste - 3 Ounces - CrackleTherm O Web - iCraft - Purple Tape - Removable - 1.5 Inches x 15 Yards - New LookRanger Ink - Artist Brushes - 7 PackRanger Ink - Tim Holtz - Distress Sprayer - 4 OuncesRanger Ink - Multi Medium - Matte - .5 Ounce


2020 Summer Home Tour- Part III The Sunroom


Happy Saturday, friends! Hope your weekend is off to a great start! Today I’m continuing on with my 2020 summer home tour. This time, we’ll peek into my sunroom.


I always think of my decorating as being rather eclectic, and I’m definitely embracing a mish-mash style in the sunroom this year. It’s a bit patriotic, with Americana touches…


…but I’m also throwing some other summer vibes in the decor this year, too.


Like these sweet prim bumblebees all tucked into a basket. And still some of my cross-stitch pillow tucks I made this spring. I’ve been enjoying them too much to put away. So out they stay.


In June, the shop where I work got in some adorable lemon picks and bowl fillers, and I couldn’t resist bringing some home. At first I thought they should be put away until next spring, but then I decided why not mix them into the summer decor?


That silly Uncle Sam doll is one of my most favorite prims I’ve ever made. The little Sam to his right was made by my Missy Nik, so of course he steals the show. They were a project from several years back during my crafty play days phase.


I added the faux lemons to this wire basket, and filled around the table with other yellow things. Some of my precious Lori Mitchell figurines. A quirky sailor duck bobble-head. And my own summer sweet corn tucks that are still listed in my AudOnes Shop.


More Americana tucked all around my favorite chair.


Lots of red, white, and blue filling my vintage laundry cart, antique earthenware crock, and vintage apple basket.


And of course, my Finley Boo, always keeping his eye on the goings-on.


I finished another cross-stitch piece last month. A nautical stitch that I absolutely adore. I don’t have enough sticky board right now to fully finish the framing, so for now, this will do.


Go Wolfpack! Nik will be a senior at NCSU this year. Can you believe that?


Hand-painted log firecrackers…. another project from by-gone crafty play days. And more of my beloved Lori Mitchell figures.


As I mentioned, a real mish-mash of summer pieces in my sunroom this year. But there’s no rules when it comes to decorating. Just follow your heart and enjoy what you love. ❤

Thanks so much for stopping by! Have an amazing weekend, friends!

Save

2020 Summer Home Tour- Part II Independence Day


Happy Independence Day to the USA!
Hello friends, and happy 4th of July to you! Hope this lovely Saturday finds you doing well. Today I thought we’d pick up again on my 2020 summer home tour, this time making a stop in another patriotic area of the house, the living room.


I have been so lucky to have collected some rather large Americana pieces over the years, and the big expanse of my mantel always seems the perfect location for these. The Bethany Lowe Uncle Sam and Lady Liberty figurines I have are a good two feet tall and I love how they fill in the space of the mantel. This area really needs something tall.

You all know that I’m a sucker for chippy old things and handmade prims, so this silly folk art doll is one of my all-time favorites. Doesn’t get much more quirky than him.


I’ve filled Uncle Sam’s arms with a little wooden painted sign and a pair of stick flags. Uncle Dolly is holding an eagle by Jim Shore. The large canisters look old, but are really brand new. Just love that vintage clip art.


I’ve always adored needlework, and now that I’ve started up cross stitch again this year, these two framed pieces make me a bit weak in the knees. Such a labor of love.


Miss Liberty and another folk art carved wooden Sam. More flags and a stack of paper mache drums.


Oh, hello! Surprise! It’s little Finley Boo. My constant shadow and companion. Now a year and a half old!


I love this vintage basket, and how perfect it is for piling and bundling. In here I have more paper mache boxes and a wooden flag, and more vintage clip art. The blue blanket is my brother’s baby quilt, made by my grandmother many years ago. The raggedy stitching next to the quilt is a patriotic cross stitch piece I started, but never finished, when I was very very young. All that’s left to do is stitch the field of stars on the flag, but the printing has long worn off of the fabric and the little x’s are no longer visible. But somehow, it feels right to me to leave it as I left it all those decades ago.


And of course, more of those adorable little Lori Mitchell characters.


Happy 4th, everyone! Where ever your adventures may take you today, I hope you enjoy the journey!

Springtime with the Sizzix Making Journal


Hello, crafty friends, happy Friday! Hope you are all doing well, and I hope you managed to have a lovely Easter weekend, even with the quarantine orders to stay at home. It was very quiet here at my house, and has been throughout the week, but I must say… the days sure go by fast. And Finley and I are making the most of the beautiful springtime weather we’ve been having in between our days of wind and rain.


Speaking of springtime, today I am sharing this sweet spring-inspired home decor frame on the Sizzix UK blog, The Making Journal. This framed project uses three of the new Tim Holtz die sets from the Chapter 2 release, including my absolute favorite, Feathered Friends. I live on the East Coast, and love to see the bluebirds that return to my yard at this time of year. To me, they are a perfect harbinger of the spring season.


I love cost-effective decor projects, like this thrift-store frame re-do. I paid less than a dollar for this sweet green-striped frame, and by using my dies and supplies I already had on hand, I created this altered frame for next to no cost. How awesome is that?


If you’d like to learn more about this project, or check out the step-by-step tutorial, be sure to stop by The Making Journal blog. And as always, thanks so much for stopping by!


The supplies I’ve used are linked below:

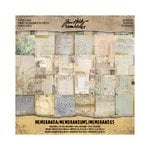
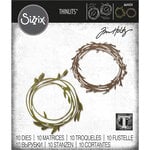
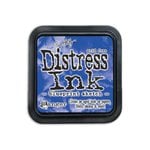
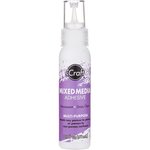
Ranger Ink - Tim Holtz - Distress Watercolor Cardstock - 8.5 x 11 - 10 PackAdvantus - Tim Holtz - Idea-ology Collection - 12 x 12 Paper Stash - MemorandaSizzix - Tim Holtz - Thinlits Die- Feathered FriendsSizzix - Tim Holtz - Thinlits Die- Funky WreathSizzix - Tim Holtz - Thinlits Die - Alphanumeric Tiny Type LowerSizzix - Tim Holtz - Alterations Collection - Thinlits Die - Funky Floral 1Ranger Ink - Tim Holtz - Distress Texture Paste - 3 Ounces - CrackleTim Holtz Distress Ink Pads - Antique LinenTim Holtz Distress Ink Pads - Old PaperTim Holtz Distress Ink Pads - Brushed CorduroyTim Holtz Distress Ink Pads - Walnut StainRanger Ink - Tim Holtz - Distress Ink Pads - Pumice StoneTim Holtz Distress Ink Pads - Black SootRanger Ink - Tim Holtz - Distress Ink Pads - Rusty HingeRanger Ink - Tim Holtz - Distress Ink Pads - Blueprint SketchTim Holtz Distress Ink Pads - Shabby ShuttersRanger Ink - Artist Brushes - 7 PackRanger Ink - Tim Holtz - Distress Sprayer - 4 OuncesTherm O Web - iCraft - Mixed Media - Adhesive - 2.1 Fluid Ounces

Happy Easter From My House to Yours


Hello, friends! Today is Easter Sunday, and although it’s a very different holiday than anything we’ve experienced before, I wanted to pop in here to wish you all a blessed and joyous day.  I heard a quote recently that I feel is particularly fitting for the time we are going through right now… every day may not be good, but there’s something good in every day. And I hope you all manage to find some of those good moments in your day today.


When the stay at home orders began coming in, I didn’t have much of a heart for decorating this year, thinking that I shouldn’t focus on something so trivial when the world is suffering. But with all of us spending so much time in our homes these days, I decided it was extra important, now more than ever, to bring out my spring decor and decorate for the season.


I find it really does help to surround yourself with beautiful things and things that make you happy when it feels like the world is caving in around you. I may not be able to control what’s happening outside, but inside I can create a comforting atmosphere for myself and my kids. And since they are both around taking online classes from home right now, they are able to enjoy the decorations as much as I am.


I am super sad that my parents won’t be able to visit this spring. They had airline tickets and were set to arrive this next week, but of course that can’t happen now. My sweet mother, who loves decorating as much as I do, has been asking to see photos of my spring decor. And that calls for another house tour. So these pictures are for you, Mom. And I hope that you all will enjoy them, too.


As always, my decorating style is a mix of vintage and antique pieces combined with new and modern things, with some of my own handmades and favorite prims thrown in for good measure. A picture is worth a thousand words, so I will let them do the talking. But you can leave me a comment below if you have any questions.


An overload of photos, that is for sure! And although that’s the end of the tour, I do have a few more pictures to share before I go. I know I’ve been sharing some cross stitch with you in recent posts, which is an old love of mine that I’ve picked up again after more than 25 years. I’ve completed both a Halloween and a Christmas project since I started up again in January… and just in time for Easter today, I’ve completed a parade of Easter chicks, and fully finished the piece this morning.


The chick pattern is from a very old book from the 80’s that I found at my local thrift store. The design was meant to be stitched in repeat several times, and was curved to go around in a circle once completed. But I modified the pattern to work in a single row, which feels more modern to me. And I stitched it on a scrap of coffee tea dyed Aida cloth using colors of my own choosing.


Over the years I’ve collected lots of trims and vintage millinery, which I’ve always hoped I’d find something special to do with… and I’m so glad to have that stash of goodies now. I gathered a bunch of velvet millinery flowers, and layered them onto a hand-stitched corduroy leaf that was leftover from one of my prim creations, and together they were clipped to the right corner of the stitchery with a big wooden clothespin. I can remove the clip and flowers to store the stitched piece flat at the end of the season.


The green pompom trim is some old Webster’s Pages ribbon that I’ve hoarded for years since my design team days. The adorable fabric is from an older collection by my friend and former Therm O Web teammate, Jennifer Jangles. Lots of happy memories there.


Thanks so much for sticking with me all the way to the end of this post! I hope I’ve been able to share a smile or two with you today. And I hope you all have a very wonderful Easter day!