Happy Wednesday, crafty friends! I wanted to share news of a fabulous and fun new holiday release from Therm O Web and GinaK Designs, and invite you all to join us as we celebrate today with a blog hop on Instagram. Both the GinaK and Therm O Web teams have put together lots of fun projects to share with you featuring this new and exclusive holiday kit.
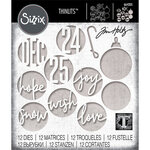
Here is a peek of the project I am sharing on Instagram today. This Limited Edition kit comes with gnome stamps, dies, stencils, and a FREE full pack of each of our Gina K. Designs Glimmering Gold and Sparkling Silver Foils. Just you wait till you see all the creative ways to use these products.
Be sure to hop along and leave comments at each stop for multiple chances to win one of two $50 Gift Cards to shop at thermoweb.com. Comments must be left on Instagram for your chance to win. Simply start at either the Therm O Web or GinaK Designs Instagram page for all the details and the complete hop list. And I’ll link you to this exclusive kit below. Remember, once this kit is sold out, it’s gone forever. So be sure to grabs yours! (click on the colored link below to shop)
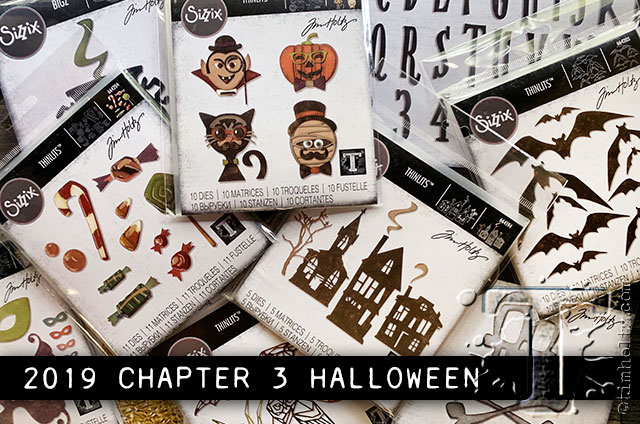
Happy Fri-yay, crafty friends! I’m back today with another fabric project to share featuring dies from the new Tim Holtz Sizzix Chapter 3 release.
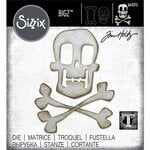
Earlier this week I posted a spooky sweet rag dolly that I made using the Skull & Crossbones Bigz die, and once again, this little pom pom pillow features the same set of bones along with a continuation of some of the tips and tricks I use for working with fabric die cuts. If you missed part one of the tutorial, simply scroll down or click here.
We left off here last time, with the step of attaching fabric appliques using Therm O Web Fabric Fuse glue. For larger die cuts that I’m planning on adding stitching to (like this skull), just small dots of glue are all you need to keep the pieces from shifting and moving around…
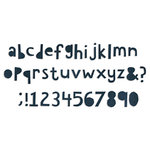
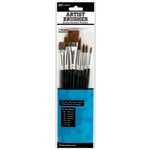
Fabric Fuse adhesive is also particularly helpful in attaching smaller, thinner, and more intricate appliques that would be rather difficult to sew around. If I’m using small pieces, like these die cut letters, I make sure to cover the entire surface of the back side with the glue, so that the appliques will be secure without the need for stitching. Just squeeze a continuous thin line of adhesive all over the applique. You can spread it out with your finger or a paintbrush, too.
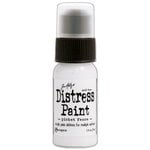
The key is to be sure to get the whole applique tacked down, since there won’t be any stitching to hold things in place. If you missed any spots, you can lift the edges and add more glue. Once I had my finished design, I went back in with Picket Fence Distress paint to add detailing to the negative facial openings and the letters and bones. Stitching was added once everything was dry.
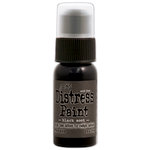
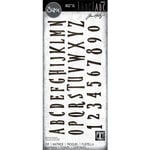
The lettering for this pillow was die cut from Therm O Web fleece using the Tim Holtz Bigz XL Cutout Lowercase Letters die. Additional o’s and the dot from the j die cut from olive and black felt were used to make the eyes. And for a final step, I dragged a Black Soot mini Distress ink pad over the edges of the bones to emphasize the design.
I hope you enjoy these quick and easy tips for using fabric with your dies. Have a great weekend, everyone, and thanks so much for stopping by!
The supplies I’ve used are linked and/or listed below:
Happy Wednesday, crafty friends! Did you all have a chance to check out Tim’s fabulous new Sizzix Chapter 3 release on Facebook Live last week? Wasn’t it amazing? Over two hours of festive and frightening new products to gawk over, and tons and tons of fantastic projects and ideas to see. If you missed it, never fear… you can watch the replay (part 1 Halloween) below.
When I shared about the new holiday release on my last post, I hinted at a secret project assignment that Tim asked me to work on for the reveal, and I know some of you have already guessed what that was. Fabric! Yes, my twist was to apply the new dies to some of my AudOnes Prims. And boy, was I excited to give that a try! A huge thank you to Tim, Mario, and Paula for this super fun opportunity!
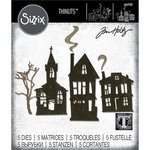
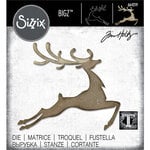
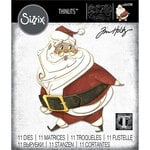
Those of you who have followed along on my AudOnes Prims venture know how much I love to create silly primitive rag dollies, so of course that was the very first project that I tackled. This cute and creepy little girl doll features some of my favorite things…. buttons and bows, Crossroads Denim and Tim Holtz Eclectic Elements fabric, and a big spooky Halloween skull emblem right on the front that was made with the new Skull & Crossbones Bigz Die.
Because the Skull & Crossbones is a Bigz die, you can easily die cut all sorts of thicker materials with it, making it perfect to use with fabric projects like this. I used wool for both the skull and bones here, doubling up the layers for the bones in her hair. And just as you can use Distress Ink and Paint to add detail to paper projects, you can apply the same techniques to add depth, age, and dimension to fabric pieces, too.
Here’s how I do it.
Begin by die cutting the bones from heavy wool or wool felt. You can use thinner materials, but something thicker really works best. I’ll share tips for die cutting thin cotton fabric in an upcoming post.
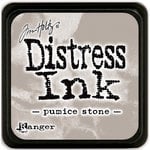
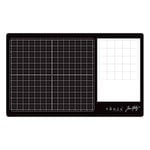
Dab Distress Inks or Oxides onto a non-stick craft mat, and then spray the inks heavily with water using a Distress Sprayer. For this project, I used Pumice Stone and Hickory Smoke Distress Ink.
*Note: use this technique only on fabric projects that you don’t plan on washing… as just like with primitive style tea or coffee staining, Distress inks will wash out in water.
Press the fabric die cuts into the ink mixture, twisting and swiping them through the inks to add color. Not dark enough? Let the fabric die and repeat the process again. Once you have the color where you like it, make sure to let the pieces dry completely.
When it comes to applying applique die cuts to fabric, I take a few shortcuts. The standard way would be to add an iron-on fusible interfacing to the back, or to attach the pieces with lots of pins. But I am hopeless with an iron, and often end up with pieces slipping or shifting with pins. So my trick is to stick my appliques down with Therm O Web Fabric Fuse adhesive. That way I can get the pieces exactly where I want them, and I know they’ll stay in place. And once it’s dry, you can go back and add stitching over the top if you wish. Love it.
For bigger die cuts, like the skull, I do like to go around the edges with a bit of machine stitching, but with the glue, that step isn’t necessary. For thinner dies, like the crossbones, I stacked two wool pieces together and simply stitched down the center. The double thickness helps add structure to loose flappy pieces, like the hair bows. And finally, you can add further details to the fabric dies, like using Distress paint to highlight the negative opening. Or adding buttons for eyes. Or tying multiple shapes together with a bit of ribbon or twine.
Thanks so much for stopping by! I’ve got lots more holiday projects to share, so hope to see you all soon!
The supplies I’ve used are linked and/or listed below:
Other: Eclectic Elements Fabric, Crossroads Denim by Indygo Junction, Wool, Stampin’Up Ribbon, Buttons
Happy Monday, friends! It’s a fabulous day in the crafting community, as today marks the release of the Tim Holtz Sizzix Chapter 3 die collection! This is the big holiday release of the year including both the Halloween and Christmas designs… and it is by far my most favorite release of the year. It may seem early, but I am super excited that these dies are becoming available right now. That gives us crafters a chance to plan and create all those holiday makes well ahead of the season this year.
I hope you’ll stop by and check out Tim’s Facebook Live release event today at 9:00AM PST (12:00PM EST) to see all the new products and some amazing project samples. I am always so honored when I get to be a part of the new Sizzix releases, and this time I am particularly excited, as Tim has given me a secret project assignment!
Shhhhh, I won’t tell yet…….but I’m sure you’ll all figure it out for yourself. It all starts soon right HEREon Facebook Live!
Christmoose and I just wanted to pop in to wish you all a very Merry Christmas! May this holiday season bring you many blessings, happy memories, and treasured moments with those you hold dear.
And I hope Santa is good to you, too!
The big day is almost here, and time has come to put away Christmas until next year…. but not until I squeeze in one last holiday project for today that I made recently for Joy Clair week on the Therm O Web blog. This is the adorable Christmoose stamp set paired with Therm O Web red deco foil and clear toner acetate sheets to make a holiday shaker gift tag.
I used a sentiment from the stamp set to create a sign post greeting for the tag, and the same sentiment was stamped repeatedly around the tag frame, too. Chris, here, was colored with Copic markers, and fussy cut. I added a bit of Glossy Accents to eyes and crystal clear Stickles to hat and snowbank. The red striped shaker window was made with one of Therm O Web’s clear acetate sheets that was foiled in bright holiday red. I’ve got the full step-by-step tutorial up on the Therm O Web blog, if you’d like to learn more.
It’s so hard to believe it, but we are just two days away from the big day, and time is running short. Although I didn’t manage to share all my “scrappy” cards from January’s retreat, I came pretty close… and I’m ending the series here today with card #10. Huge thanks to all of you for following along on my journey and attempt to use up some old holiday collections and paper scraps.
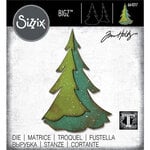
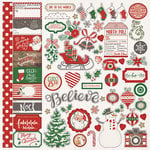
Today’s card is made almost solely from Echo Park’s I Love Christmas collection, and features a woodland scene built mostly from leftover stickers. I used dotty patterned paper to mimic the look of a gentle snowfall in the background, and cut a rounded curve along a scrap of white cardstock to give the tree some snowy ground to stand on. Used another piece of a border sticker with v-notches cut into the ends as a sentiment banner across the center of the scene. The only item from the Dear Santa collection, and single tiny gold star, dresses up the top of the tree.
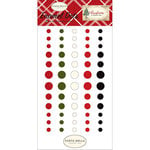
The red border across the bottom of the card is actually part of the bar code strip at the bottom of the green patterned paper, and since there was no printing on this section, I thought it added another bit of color and detail to the card. Then white cardstock and red enamel dots finish this design.
Phew, Lots of cards from my scrap pile. The never-ending scrap pile. I do love a good challenge, though, and my annual January retreat is rolling around soon…. so perhaps the odyssey to use up these two particular collections doesn’t end here….
Hi friends! I’m back again for day 9 of my scrappy holiday card series here on my blog. From now until Christmas I hope to share as many cards as I can that I made at a scrapbook retreat in January with leftover scraps from two of my favorite Christmas collections, I Love Christmas by Echo Park and Dear Santa by Photo Play Paper. Today’s card features an itty bitty snowman scene.
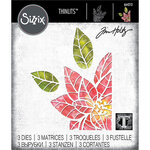
My scraps leaned heavily towards the Echo Park line, so once again everything on this card is from I Love Christmas… and you can see how studiously I’m trying to use up these papers by all the layers on here. The snowman and sentiment label are from the Alpha Sticker sheet, and felt a bit small on their own, so I stacked them on a 3×4 journaling card to create a wee frosty scene. An additional poinsettia flower, fussy cut from the same patterned paper used in the background, adds a little more detail and balance to the frame.
Of course I had my trusty twine and enamel dot stash with me, and those, along with a bit of solid white cardstock, finish this design.
One more card down, and one more day, too! Christmas will be here soon! Are you ready?
Thanks for stopping by, crafty friends! Happy Fri-Yay! Christmas is almost here now… only four more days to go… and I still have lots of holiday projects that I’d love to pack in here on the blog. So today, I’m sharing a project heavy post with two cards and two gift boxes that I made for the recent Paper House Productions match up on the Therm O Web blog.
The gang at Paper House sent us their adorable Christmas Joy collection to play with, and in my current scrappy “use up everything that you can” state of mind, I did my best to make a serious dent in all of the papers, stickers, foiled paper, printed transparency, and washi tape that was included in the kit. So this first card pretty much got the works.
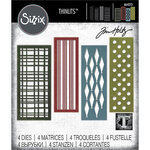
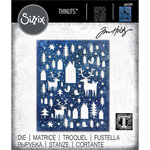
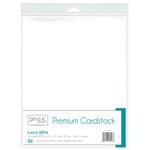
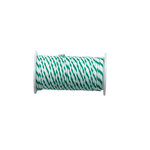
I used Therm O Web cardstock in a bright holiday color, and one of our designer stencils to create the background. Then layers of pretty Paper House goodies all tied up with string. Therm O Web glitter deco photo corners bring in a touch of sparkly holiday gold.
My next card uses many of the same elements, but this time arranged into a natural woodland theme with dark woodgrain patterned paper and the fresh green of pine. I added in a bit of shine with gold foiled paper, sticker, and journaling card… and of course those glittered photo corners, too.
With still a lot of Christmas Joy goodies left, I decided to put them into action on some of my holiday gift wrapping this year. By combining leftover journaling cards with stickers, I was able to whip up some quick gift box toppers to jazz up recycled boxes.
I needed to pop up the topper with foam dots to nest on top of the simple twine bow, so I started with heavyweight Therm O Web cardstock, topped it with a printed journaling card, and bedazzled it with dimensional and foiled stickers. So easy, and a great use for those alpha stickers for a non-scrapbooker like me.
Along those same lines, I used one of the larger 4×6 journaling cards to create a topper for a slightly bigger gift box. The red cardstock was this time added to the box lid to cover the manufacturer labels that I didn’t want to show, and on top of that I layered a piece of the gold foiled transparency sheet. I added an enamel dot to Rudolph’s nose, and once again stacked the journaling card onto cardstock to give it the strength to stand up to foam dots. Gold deco photo corners and a slim gift tag created from some of my smaller scraps finish up this design.
In my current holiday “scrappy” state of mind, I am still attempting to use up the rest of these pretty Paper House things…. and more gift box toppers have entered the scene. I am, however, still baffled at how paper seems to multiple when you’re not looking, and is near impossible to actually use up. I’m going to try, though. Just to win this one time!
I do have step by step tutorials for these projects up on the Therm O Web blog, if you’d like to learn more. Click HERE for the cards, and HERE for the gift box toppers.
Happy weekend!
The supplies I’ve used are linked and/or listed below:
Paper House Productions Christmas Joy Collection: Craft Set, Planner Stickers, Puffy Stickers, Christmas Magic Cardstock Multi Pack, Epoxy Stickers, Washi Tape Set
Hi friends! I’m back again for day 8 of my scrappy holiday card series here on my blog. From now until Christmas I hope to share as many cards as I can that I made at a scrapbook retreat in January with leftover scraps from two of my favorite Christmas collections, I Love Christmas by Echo Park and Dear Santa by Photo Play Paper. Today’s card features another jolly Santa, but this time from the Photo Play line.
This card uses a good mix of both collections, and has a bit of that old world feel that I love so well. The Santa image and the holly round are stickers from the Dear Santa Alpha sticker sheet. The sentiment is from that journaling prompt paper that is a card-making challenge on it’s own, but works so well when cut into pieces. There’s a bit of a border sticker from the Echo Park line, and I added dotted paper and a red solid from that collection to match, too.
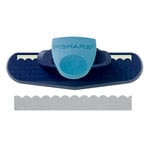
I used both of the punches I brought along to the retreat, and made a frame from the circle die set to help set off the smaller Santa sticker. Wrapped the card in twine, and added one of those random buttons that was loose in the enamel dots. Then brown Distress ink around all the elements adds that vintage look and finishes off this design.
Christmas is inching ever closer! Less than a week now to go, and still lots of cards left to share. Should have started this a long time ago!
The supplies I’ve used are linked and/or listed below:
Photo Play Paper Dear Santa 12×12 Paper: Holly, Dear Santa
Hi friends! I’m back again for day 7 of my scrappy holiday card shares here on my blog. From now until Christmas I hope to share as many cards as I can that I made at a scrapbook retreat in January with leftover scraps from two of my favorite Christmas collections, I Love Christmas by Echo Park and Dear Santa by Photo Play Paper. Today’s card features my favorite happy combo of polka dots and stripes and a bit of creative paper piecing, too.
I had mentioned on one of my previous scrappy posts how there was one patterned paper from the Dear Santa collection that rather challenged me, as it had large journal prompts that didn’t really work for me for cards. My solution for that was to cover most of it so only the borders showed, and that’s what I did here for the base on this card. I still liked the candy cane stripes, and the green label looks like I added another layer… and you all know how much I like my layers!
To cover up the rest of the tricky paper, I added some happy I Love Christmas dotty paper that I edged with a portion of a border sticker from the same line. With a symmetrical sticker like this scalloped design, I often cut them down the middle to create two stickers from one. Bonus.
The stockings are from a 12×12 border strip from one of the Dear Santa papers. I placed it at an angle and added another border sticker for the sentiment below, and twine to cover the edge on top. I fussy cut an additional stocking from that same strip, and popped it up with foam dots and topped it with an Echo Park sticker. I had a few random buttons in my enamel dots pouch, so I threw that in to finish this design.
It’s a happy day for me! My daughter comes home for her holiday break today, and my son and parents are in town, too. Now it really feels like Christmas. ❤
The supplies I’ve used are linked and/or listed below:
Photo Play Paper Dear Santa 12×12 Paper: FaLaLa, Dear Santa