New Year’s Eve

Hello everyone!  Have you all made your New Year’s Resolutions yet?  Today is the day to be thinking about that.  I’ve decided to revive last year’s resolution……have a good time, all the time.  Sounds like a winner to me. 🙂

I’ve felt in the mood for some flowers after all the Christmas cards, so broke out some of my bright and happy papers today to play along with the current sketch over at 2sketches4you.

Papers by MAMBI, rub-on from Pebbles, Inc.  The scalloped trim is from Making Memories’ Animal Crackers line.  Also added some Imaginisce trim and a button from MME.  Ran the card through my sewing machine for some finishing details.

And here is Laura’s sketch #42 for you all to play along.

Be sure to check out the website for a ton of inspiration from the designers.

Thanks so much for stopping by!  Hope you all have a fabulous evening tonight, and be safe.  Think we might be breaking out the bubbly and having ourselves a round of dominoes. 😉

HAPPY NEW YEAR!


Joy is the Feeling of Grinning Inside

Hi everyone!  Isn’t that a great saying?  Joy is the feeling of grinning inside.  That sentiment can be found in Webster’s Pages great assortment of Fabric Fancies.  Fabric Fancies come in two collections, Postcards from Paris and Winter Fancies. They make beautiful and unique embellishments for card-making and scrapbooking, and I love how easy they are to work with………easy to adhere, easy to cut, and easy to fall in love with.

I adore the bright and happy quote from the Postcards From Paris Fancies, and with this as my starting point, I was inspired to make this card.

Webster’s Pages supply list:
Papers: Paris Couture, Belle Rose, and La Boutique de Jardin
Silhouette: Postcards From Paris
Fabric Fancy: Postcards From Paris
Trims: Natural Scallop from the Botanical Trim collection and Natural Trim from the Elegant Trim Collection

I trimmed off the scalloped edge from the Natural Scallop trim and edged the striped paper with just the scallop.  Knotted another small piece of that trim and added it to the right side along with some adhesive pearls from KaiserCrafts.  With the remaining piece of trim, I ran a loose running stitch along one side and gathered the trim into a rosette to place behind the Silhouette.  Then added the  Making Memories glittered flourishes and Prima pearls.

This was my post today on the Webster’s Pages Facebook site.  Great place to stay up to date on the latest and greatest Webster’s Pages happenings.  You can also get lost in a couple of games of Pathwords while you’re there. 😉

Thanks so much for stopping by!  Always love to hear from you!

All is Calm

Good evening everyone!  Just like that, the Christmas frenzy is officially over and a sort of calm has descended over the house.  What a difference from the last couple of weeks.  Today was a nothing-that-you-absolutely-have-to-do-on-the-list day. Mom did want to check out a couple of stores this morning in search of clearance Christmas cards and wrapping, but then it was back home to the peace and quiet.  And how nice it is to have some peace and quiet. After all the rush, it’s blissful to just s.t.o.p. and s.l.o.w. down.

I wanted to share some of my favorite photos from yesterday with you all.

Nik got an important letter from Santa telling her about a very special present that she will be receiving, hopefully in the near future.  We are super excited about it, and I can’t wait to share more on that soon.

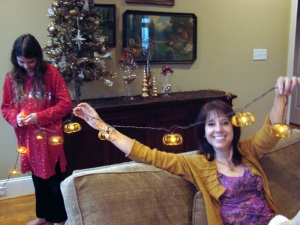
Look for these bad boys next Halloween.  They are my new string of pumpkin lights.  And check out my new village people.

Score!

I hope you all had a fabulous holiday in your house, filled with laughter and love, good food, friends, and family.  Goodnight everyone!

Countdown to Christmas- Day 24

Twas the night before Christmas, and all through the house, not a creature was stirring, not even a mouse.  The stockings were hung by the chimney with care, in hopes that St. Nicholas soon would be there.

Happy Christmas Eve, everyone!  What a magical night it is!  After all these weeks of preparation, the long awaited moment is finally here.  I can still so clearly remember the excitement I felt on this night as a child.  I dreamed of seeing Santa Claus in person and insisted on sleeping out under the Christmas tree every year in hopes of catching a glimpse……but I never did.  And now this year, my little Nik tells me she is going to sleep on the couch so she can see Santa.  How hard I tried to stay awake all those long years ago, how heavy my eyelids would become, how I would tell myself I could close my eyes as long as I stayed awake listening………how it makes me smile to think of my daughter carrying on the tradition.

I have a few last Christmas things to share tonight.  My last Christmas card of the season.
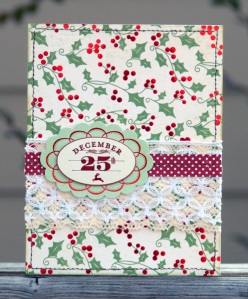
Making Memories Mistletoe paper, K&Co. die-cut and rub, Webster’s Pages Ivory & Cream trim from the Elegant Trim Collection.

An early Christmas present I received from my sweet mom.  A gorgeous white feather tree to add to my tree collection.
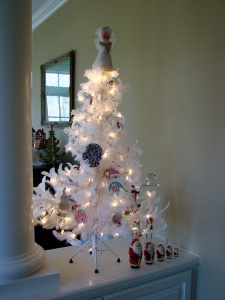

This tree holds most of the hand-made ornaments that both the kiddos and I have made over the years. It holds their tiny fingerprint reindeer and wooden stick framed photos, clay cut-out snowmen, fun-foam creations and my scrapbooking ornaments from years past.  Treasures, each and every one of them.

And here are a few of my favorite handmade ornaments that I made back in 2005.  I enjoy these so much, I might have to make a few more next year.
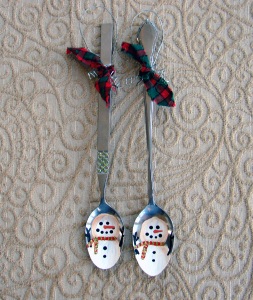
Thrift store spoons turned into cute little snowpeople.  This is the pair I made for my kids.  They look pretty spiffy in their striped scarves and touches of Stickles bling.
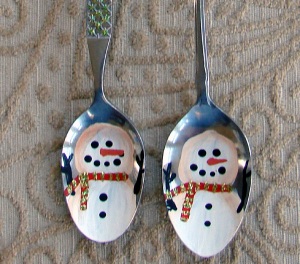
These snowmen were made from acrylic paints and Stickles glitter.  No special treatment is needed to paint on the metal, nor is it necessary to seal the paints afterward. I just made two ball shapes from white paint, and after drying, I created the dots for the faces and buttons using the back of my small paintbrush.  Let dry between each stage as you add the rest of your finishing details.  Once the paint was completely dry, I applied brown chalk pastel to the edges with a Q-Tip.

I also made some country cousins to my city slicker snowmen.

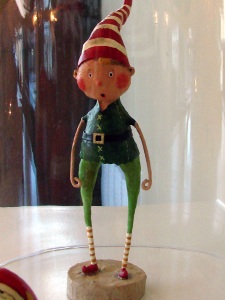
Here is another Christmas present I got from my friend yesterday.  I became familiar with these Lori C. Mitchell figurines for the first time this Halloween, and I now have 3 Halloween pieces and this fun Christmas guy.   This is Tinker Twinkle, new for 2009.
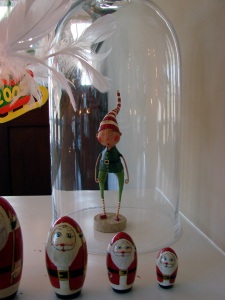
I think he’s shocked to find himself stuck under glass.  Look at the expression on his little face.
And before I go tonight, I have one final project to share.  My brown paper bag gingerbread man Nik and I made together in an art class when she was 2.

Trace a gingerbread shape onto two flatted grocery bags.  Cut out, stuff with newspaper, and hot glue together. Paint and decorate and love forever. 🙂

Thank you so much for spending part of your Christmas Eve with me.  I hope you all have a wonderful Christmas day tomorrow with the special people in your lives.  Merry Christmas everyone!

Countdown to Christmas- Day 23

Good evening everyone!  Two days and counting.  Christmas is almost here.  I really like these last few days before the big day……I’ve finished the to-do list, for the most part, and can kick back with my family and enjoy.  I was just sitting on the couch chatting with my mom and gazing upon the tree and all the pretty lights and decorations.  These are the moments I want to savor. It doesn’t get any better than this.

With all the activity this last week, I haven’t been doing much scrapping, but I do have a few more photos of some of my decorations to share tonight.

I call this area my “gold ensemble”.  All my gold colored pieces ended up going here, including my gorgeous new gold tree I received for a present.  I am so excited about that tree.  I’m already thinking it will be a perfect “fall” tree for next year.  I don’t have many ornaments for it yet.  Perfect excuse to do some more shopping. Mom did bring me her collection of clear glass ornaments she had collected over the years which look pretty on the new tree.  I also have my wooden creche figures from when my kiddos were babies on the plate rack by my easy chair.  I got in the habit of putting them down low so that the kids could easily reach and play with them, and the tradition has just stuck with me.  Funny how little things like that happen without you even realizing it.

And although I haven’t been doing much in the way of scrapping, I do have one quick card to share.

Old Paper Salon papers, which I still love to pieces, Webster’s trims, and Prima crystals.  Added a little machine stitching and a rub-on greeting from Pebbles, Inc.

Thanks so much for stopping by!  Hope to see you all tomorrow!

Countdown to Christmas- Day 22

So all day today I keep saying that it’s Monday.  I would swear that it’s only Monday.  It can’t be anything but Monday.  It can’t.

I think I must be in denial that Christmas is now only 3 days away. 🙂

At least I’m pretty much ready for it to come. I spent today doing my holiday baking, which is an annual tradition for me.  Baking is not one of my strong points, I must admit.  I can hear some of my friends snickering right now.  However, the key to my holiday baking is to keep everything super simple.  I have a couple of “go to” treats that I tend to make every year, and this year, I paired those favorites with a few new ones from my good friend.  Kathy and I spent the day immersed in flour, sugar, butter and chocolate, made only a minimal mess, and didn’t even set the kitchen on fire.

We made Kathy’s delicious Snicker cookies and Peppermint bark, and my chocolate dipped pretzels and peanut brittle.  I know Kathy will be sharing her recipes on her blog, so be sure to check it out.  Here is my recipe for peanut brittle.

Into a 1 1/2 quart microwave safe bowl, mix 1 cup of sugar and 1/2 cup of white corn syrup.  Stir and microwave on high for 4 minutes, stirring half way through.
Add 1 cup of roasted, salted peanuts.  Microwave on high 3-5 minutes until light brown in color.  Stir.
Add 1 Tbls. butter and 1 tsp. vanilla.  Stir.  Microwave 1-2 minutes.
Add 1 tsp. baking soda and stir.  Brittle will get light and foamy.
Moving quickly, pour onto lightly greased or non-stick cookie sheet.  Let cool.  Break into pieces.

Today was my day to post on the Webster’s Pages Facebook site.  I created this card using papers from the Postcards From Paris line along with some of my favorite Webster’s products.

Here is the full list of Webster’s supplies:

Patterned Paper: La Boutique de Jardin and Romantique Chic from the Postcards From Paris Collection.
Designer Vellum: Winter’s Wings Vellum
Fabric Fancy:  Postcards From Paris
Silhouette: Nature’s Storybook Collection
Whimsy Thread:  Postcards From Paris
Trim: Coco Lace from the Classic Trim Collection and Velvet Ruffle from the Botanical Trim Collection

That gorgeous photo corner was cut directly from the designer vellum, and I also added some machine stitched detailing and crystal flourishes from Prima.

Thanks for stopping by everyone!  Hope you’re having a great Monday……..

er, I mean Tuesday!

Countdown to Christmas- Day 21

Hello everyone!  Cannot believe it’s only 4 more days until Christmas.  Just so unbelievable how quickly the time flies by.  At least I’m pretty well good to go at this point.  I’ve mostly finished my shopping and have tackled a large portion of the wrapping.  Tomorrow I plan on doing some baking.  Want to make some treats for friends and neighbors.  And today I made a few more cards to get mailed out.  At this rate, I should be done by Friday. 😉
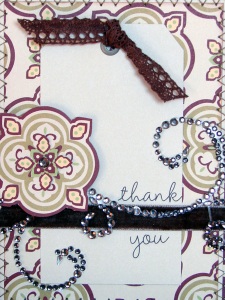
I do love this Mistletoe line by Making Memories, and since I still had some scraps laying out on my desk from the other day, I decided to see what else I could create. For this card, I simply used a piece of the striped patterned paper for the background and stitched a zig-zag line on my machine for a bit of detail.  I placed a couple of strips across the width of the card and added the large journaling sticker in the center.  The greeting was cut directly from the patterned paper.

The second card started with the same foundation.

I had one remaining felt embellishment which I paired with a smaller journaling sticker, and again cut the greeting directly from the paper.

I hope that with the hectic pace of the holidays, you all are finding time to enjoy this beautiful season with your friends and family.  It is such a wonderful time of year, and it goes by too quickly.  It’s so easy to lose sight of what’s really important in our rush to get everything accomplished that we set out for ourselves.  I am trying to slow down and savor this special time with my parents and kids.  It is truly a gift.

Before I go this evening, I would like to share this fabulous, yet quick and easy soup recipe that I made tonight.  It is Gypsy Soup, from the Moosewood Restaurant.  One of my favorite soups…..rich and hearty and healthy, too.  Tastes like you slaved away all day, but will only take you about half an hour to prepare.  How perfect is that for this cold and busy time of year?

Enjoy!

Thanks so much for stopping by!

Photo courtesy of cooking-books.blogspot.com

Countdown to Christmas- Day 20

Evening everyone!  I just finished watching the season finale of Survivor, my favorite show.  Any other Survivor fans out there?  I always love seeing who wins that million dollars, but I have to admit that I hate to see the show end, too.  I am a definite fan.

It has been a busy and productive weekend.  With so few days left until Christmas, I’m glad that my to-do list is starting to shrink to a manageable size.  Still working on a few things, of course. Here is a card I made today using some of my favorite Webster’s Pages papers and trim.

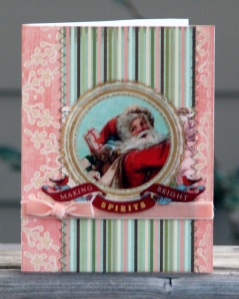
Sorry about the blurry photo, guys.  That adorable Santa image is a transparency, which my camera had difficulty focusing on.  The transparency is K&Co. from their Evergreen line, and the papers are from the Winter’s Wing collection by Webster’s Pages.  Trim is from their Winter Trim Collection.  I added a little detailing with a simple knot of trim and machine stitching.

I also wanted to share a few photos of our holiday “miracle” here in NC….a touch of snow before Christmas.  Very unheard of, and very, very brief.  Lasted just long enough to grab the camera and dash outside.

Maybe this means we’ll see more of the white stuff this year!  Well, a girl can hope…

Thanks so much for stopping by everyone!

Countdown to Christmas- Day 19

Evening everyone!  Today has been one long and tiring day of shopping, and oh my goodness, am I ever worn out.  Still haven’t completely finished everything that I hope to accomplish, but today was a good day.  Feels good to scratch one more item off the list.
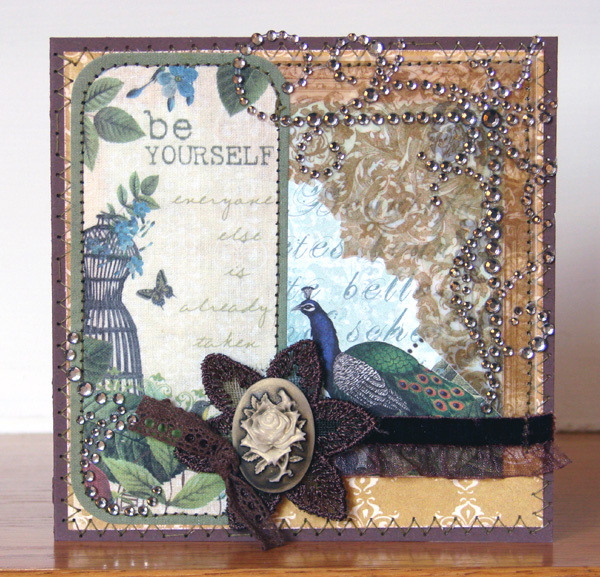
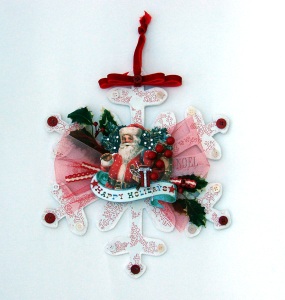
Tonight I have a fun crafty project to share.  A wooden snowflake that I’ve altered and plan to create a holiday wreath with.

I first covered the snowflake with some KI shimmer paper and then edged the snowflake with white paint and glitter.  Added buttons to each arm of the snowflake and a ribbon tie at the top.

In the middle I added a big layered bow made of tulle, trim, and wide organdy ribbon.  The Santa image is a die cut from K&Co.’s Evergreen line, which I enhanced with gems, a berry pick, baker’s twine, and a little present.  I tucked some holly into the bow and added a Noel rub on to the ribbon.

I’ve gotten as far as attaching my snowflake to an evergreen wreath and hanging it on the back of my kitchen door, and think that might be it for this year.  Will have to add the rest of the beautification to next year’s project list. 😉

Hope you all are having a wonderful weekend.  With less than one week until Christmas, I’m sure they are busy busy.  Just keep breathing, and we’ll all make it together! 🙂

Thanks so much for stopping by everyone!

Countdown to Christmas- Day 18

Day 18 realization…………

we have exactly one week until Christmas…..

And I have not finished my shopping, my baking, my wrapping, or my making of the Christmas cards….let alone my mailing of the Christmas cards.

Not good.

My day 18 challenge to self……

Make some Christmas cards that don’t take you all day to make and don’t have embellishments too thick to mail in a regular envelope.

And that’s kinda hard for me, guys.  I have an urge to keep adding pretties to every card, and I haven’t been happy lately unless each card is about a 1/2″ thick.  I want to add big bows and little jingle bells and lots and lots of pop dots.  And the post office does not seem to appreciate these extra, special little touches.

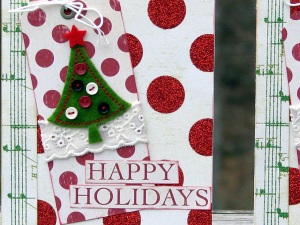
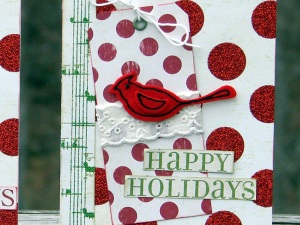
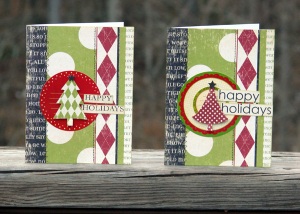
So this is the challenge I gave myself this afternoon.  To create some fairly easy, fairly flat cards that I could quickly get out in the mail.  I only allowed myself the use of pop dots, and used up some scraps of Making Memories Mistletoe papers and remaining embellishments to create 2 sets of 2 cards.

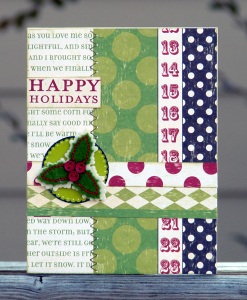
Same card base, just a different felt embellishment.  The Happy Holidays greetings I cut directly from the patterned paper.

Again, the same card base.  I cut the tree images and greetings from the paper.  And on this set, I used the Mistletoe cardstock stickers behind the trees.  I also added a little extra detailing with some machine stitching and touches of Stickles glitter.

Making multiple cards from the same basic design is a trick I utilize often when trying to make many cards at one time.  Why keep re-inventing the wheel?  And besides, this saves my brain cells. 😉

Thanks so much for stopping by everyone!  See you all tomorrow!